
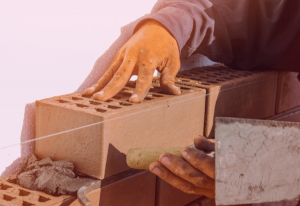
There are lots of skills and tools needed for work in bricklaying, more than you might initially think. There are also unique tools and terminology. To help you out, today we’re going to talk about what profiles in bricklaying are.
Bricklaying profiles are guiding poles that assist bricklayers in building a straight and level wall. They are placed in the wall corners with strings running from one corner to another. Profiles can be used on internal and external corners, but the first three courses of the wall must be built first.
Let’s look further into this.
What is a bricklaying profile?
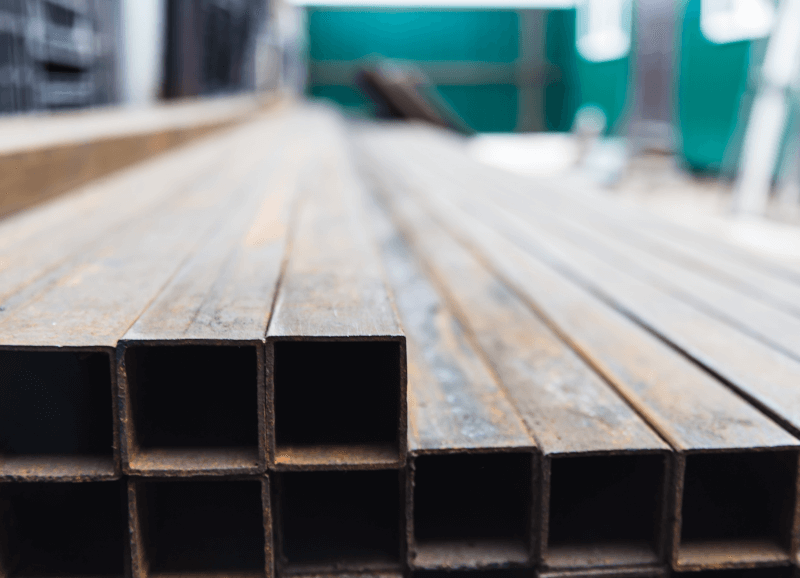
A bricklaying profile is a long, square, corner post that is attached to a wall during the bricklaying process. They attach to either side of a corner as a guide to lay bricks straight and in line to create a good corner. Bricklaying profiles help save time because bricklayers don’t need to take more steps to ensure the wall is level, square and plumb. All of these steps are taken care of when setting up the profile.
Bricklaying profiles are set up with top steady profile clamps that are attached to the building frame. Once attached to the building frame, the bricklaying profile is inserted and plumbed up. Then the guide is set for bricklaying to begin.
Bricklaying profiles are usually made of lightweight aluminium. This material is strong and sturdy, but also easily handled. Some bricklaying profiles are also made of steel. This is because bricklaying profiles need to be strong to maintain the structure guide for a wall. Bricklaying profiles can also have extra guidance including etchings for bricks and blocks. These help to ensure the wall is always level. This is a feature that helps reduce the steps needed to check the level of a wall. It’s a bonus because it can save time and help bricklayers work quicker when laying corners.
How do you use a bricklaying profile?
Using a bricklaying profile is a fairly simple process, but before you begin, you need to build the first three courses of the wall. This is because the clamps that hold the profile in place hook onto the first few layers of brick/stone.
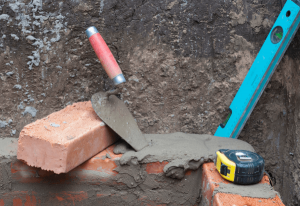
You will need to create small slots, about 40mm deep, for the profile clamps in the corner you’re wanting to attach the profile. Carefully measure either 225mm, 350mm or 450mm from the corner. This is where you’ll add the slots for the retaining bolts but be aware that there’s a risk of chipping bricks when creating these holes. To best prevent this, you should use a joint chisel. The other option is to use a mortar spike which you tap into the mortar near the corner. Then twist the screw to tighten against a profile in the corner.
 The next step is to place the profile pole by the wall base. Some profiles come with a setting attachment. Make sure the curved side of the plate is facing down and towards the wall.
Use the setting attachment to place the profile at the corner you want to profile. Make sure this attachment is gripped firmly in place. It should be sitting tight against the bricks once properly attached.
Next, slacken the adjusting screws at the bottom on the settling attachment fins. This should cause the profile to lean slightly away from the bricks which is useful for accurate plumbing later.
Then you need to attach the clamping bolts. Place the clamping bracket on the short end first. Make sure the arms and the bolt hook are facing the same way. Fix this in place with a wing nut. Then attach the bolts to the fins at the bottom and tighten the wingnuts.
Once this has been completed, the profile will be attached to the initial brickwork by the clamps. The setting attachment can now be removed.
Once you remove the attachment, use a spirit level on either side of the pole to make sure it’s level. Adjust the clamp and placement as needed to make it level.
Sometimes you might need to add some construction tarp between the corner and the profile to level it out. But once your profile is in place, you can be sure that the rest of the wall can be laid properly.
Is there a quick way to use bricklaying profiles?
There is a quicker way to use a bricklaying profile if you have experience with them. Once you have worked in bricklaying for a while, you become more confident in your measuring skills.
The first step is still to complete the first three courses of the wall. This is because you need bricks to attach the profile to. Once the first three courses are completed, you can grab your profile and line it up against the corner. Profiles come in a range of different sizes, but a 2.7m aluminium profile box is a great option.
After you figure out where you want to put the profile, measure appropriate spots to place the clamps. Having 2 clamps on either side of the profile is a good option.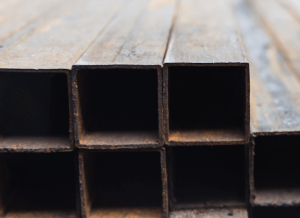
Knock the first clamp into the spot of mortar that you measured out. A good clamp for this method is an external g clamp. Then, holding the profile in place, tighten the screw against the profile.
Once you have tightened the clamp and profile against the bricks, use a spirit level to check the profile level. Adjust the profile and clamp as necessary to make it level. Then you can add a second clamp above the first. This stabilises the profile more.
Follow the same steps of adding the clamp and adjusting the profile level by using a spirit level. Once the bricklaying profile is level and secure, you are ready to continue building the wall!
There is less measuring in this method which is why it’s only recommended to be considered by experienced bricklayers. The last thing you want is an uneven wall from not properly measuring every step along the way.
Are bricklaying profiles different to masonry profiles?
 Profiles in masonry are the same as bricklaying profiles. Most profiles are multi-purpose and can be used for both bricks and blocks. This means they will be used for brick mason work.
Being different materials, you will need to consider how best to attach the clamps. You don’t want to chip the bricks or stone. This is why we recommended using a mortar spike or joint chisel.
You can follow the same process of attaching a profile in masonry work that you do when using them for bricklaying. Remember to check the level of the profile to keep your walls and corners square, level and plumb.
A profile is one of the most helpful tools that a bricklayer can have. They have significantly reduced the amount of time needed to ensure every brick is laid straight. It can take time to learn how to best use a bricklaying profile, but they will save lots of time. The best part is that you are still using all of your bricklaying skills in a more efficient manner.
Every bricklayer needs the best quality bricklaying tools. Check out our Paragon Tools shop to stock up. We also have more brick resources such as what bricks can be used for a firepit. Wondering if there’s a bricklayer shortage in Ireland? Find all the answers in our Paragon Tools resources.

